
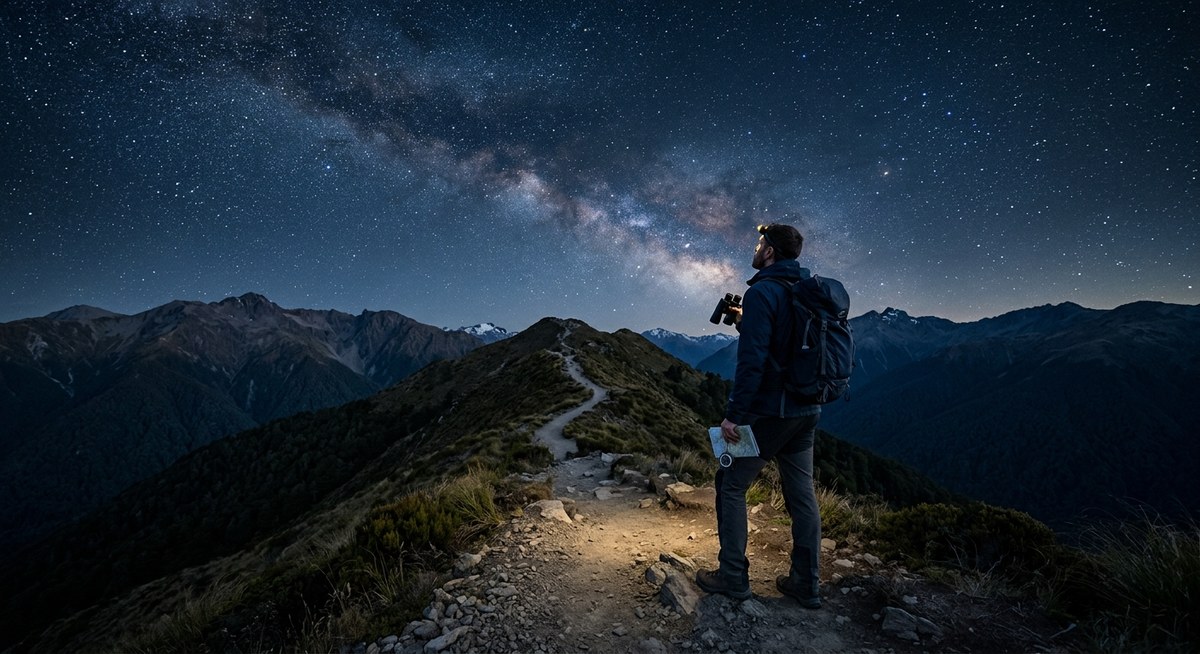
The Milky Way stretches across a sky so dark it feels like velvet. You are standing on a trail you have never walked before. The sounds are different at night. The air smells like pine and cool earth. Everything looks unfamiliar. That is the thrill and the challenge of night hiking.
Picking the wrong route can turn a magical evening into a stressful ordeal. Trail markers vanish in the dark. What looked like a gentle slope in daylight becomes a risky drop off. The good news is that choosing a trail for stargazing does not have to be complicated. You just need a framework that balances safety with scenic payoff.
Choosing a night hiking route means prioritizing safety, ease of navigation, and open sky views. Look for trails with low technical difficulty, clear markings, and minimal tree cover. Plan around moon phases for optimal darkness. Check weather forecasts and bring redundant light sources. The best night trails are familiar routes you have already hiked in daylight. Start with short loops under two miles, then build confidence for longer adventures.
Why Night Hiking Is Different from Day Hiking
Daylight gives you distance vision, color contrast, and depth perception. When the sun goes down, your brain has to work harder. Shadows play tricks. A root on the trail looks like a snake. A gap in the trees looks like a cliff edge.
Night hiking also changes how you judge time and distance. A two mile loop can feel much longer when every step requires attention. Your pace slows down by 30 to 50 percent compared to daytime. If you usually hike a trail in one hour, plan for at least ninety minutes after dark.
The rewards are worth the extra care. Fewer people mean more solitude. The stars put on a show that no city sky can match. And there is something primal about moving through the landscape by headlamp. It strips away distractions and puts you in the moment.
If you are new to night hiking, start with a trail you already know. That gives you a mental map to fall back on. For help finding options near you, check out our guide to discovering the most scenic hiking trails for your next adventure. It includes trails that work well for both day and night use.
What Makes a Trail Right for Night Hiking?
Not every trail is a good candidate for a night hike. Some have too many obstacles. Others are poorly marked. Here are the factors that separate a great night trail from a risky one.
- Low technical difficulty. Avoid trails with scrambles, exposed ledges, or river crossings. You want smooth, wide paths with gentle grades.
- Clear trail markings. Blazes, signs, and cairns should be frequent and easy to spot with a headlamp. If the trail is confusing in daylight, it will be worse at night.
- Open canopy for stargazing. Ridge lines, meadows, and south facing slopes offer the best views of the night sky. Deep forest blocks out the stars.
- Short distance for first attempts. Start with trails under three miles round trip. You can go longer once you know your night hiking pace.
- Cell service or easy access. If something goes wrong, you want to be able to call for help or walk out quickly.
- Permits and night access rules. Some parks close at sunset. Always check regulations before heading out.
If you are unsure about your fitness level for a particular trail, read our article on how to choose the right hiking trail for your fitness level. It breaks down difficulty ratings in a way that applies to both day and night hikes.
A Practical Process for Choosing Your Route
You do not need to be a professional guide to pick a good night hiking route. Follow these five steps to narrow down your options.
-
Start with a trail you have already hiked during the day. Familiarity is your biggest safety asset. You already know where the tricky sections are, where the trail widens, and where the best viewpoints sit.
-
Check the moon phase on the night you plan to go. A full moon lights up the trail like a lantern, but it also washes out the stars. For the best stargazing, aim for a new moon or a crescent moon that sets early. Many night hiking apps show moon rise and set times for your location.
-
Look at the trail’s elevation profile. Steep climbs are harder to manage in the dark. Choose a route with less than 500 feet of elevation gain per mile. Flat trails along lakes or through meadows are ideal for beginners.
-
Read recent trip reports. Conditions change. A trail that was clear last month may have fallen trees or washed out sections. Sites like AllTrails and local hiking forums often have recent updates from hikers.
-
Walk the trail in daylight one more time before your night hike. This is the single best thing you can do. You will notice details you missed before, like where the trail bends or where roots cluster.
For more guidance on matching trails to your experience, take a look at our best hiking trails for beginners: start your outdoor adventure today. Many of those beginner friendly routes also work well for night hiking.
Comparing Trail Types for Night Hikes
Different trail types offer different advantages and challenges after dark. The table below breaks down the most common categories.
| Trail Type | Best For | Watch Out For |
|---|---|---|
| Loop trails under 2 miles | First time night hikers, stargazing near the car | May feel short once you are comfortable |
| Out and back trails | Easy navigation, you just reverse your steps | The return trip can feel monotonous |
| Ridge line trails | Unobstructed sky views, cool breezes | Wind exposure, no trees for shelter |
| Desert trails | Dry conditions, wide paths, incredible star views | Loose gravel, cacti near the trail, temperature drops |
| Forest trails | Shelter from wind, soft ground, quiet atmosphere | Limited stargazing, harder to spot trail markers |
| Coastal trails | Ocean views, open sky, flat terrain | Tides, slippery rocks, fog risk |
| Mountain summit trails | Dramatic views, sense of accomplishment | Technical sections, sudden weather changes, altitude |
If you enjoy coastal scenery, our list of why these 6 coastal hiking trails belong on your bucket list includes several routes that are flat and open, making them excellent for night hikes.
Common Mistakes to Avoid
Even experienced hikers make errors when choosing a night route. Here are the most frequent ones and how to avoid them.
“The biggest mistake I see is people overestimating how fast they can hike at night. Your pace drops by at least a third. If you plan a five mile loop, expect it to take as long as a seven or eight mile day hike. Always add a buffer for rest breaks, navigation checks, and stargazing stops.” – Ranger Kelly Abrams, Shenandoah National Park
Another common error is relying on a single light source. Headlamps fail. Batteries die. Always carry a backup flashlight or a second headlamp. Keep your phone charged and download offline maps before you leave.
Many hikers also forget to dress for changing temperatures. Nights can be 15 to 25 degrees cooler than daytime highs. A warm layer and a wind shell can make the difference between a comfortable hike and a miserable one.
Finally, do not skip the pre hike checklist. Tell someone your route and expected return time. Check the weather forecast for wind, clouds, and rain. Clouds ruin stargazing and make trails slippery.
Packing the right gear is just as important as choosing the right route. Our roundup of essential outdoor gear every hiker should pack for long trails includes items that are especially useful for night hikes, like extra batteries and a compact first aid kit.
How to Find Solitude on Night Hikes
One of the best reasons to hike at night is the silence. Most trails that are crowded during the day empty out after sunset. But some routes still attract evening crowds, especially near popular stargazing spots.
Look for trails that are less famous but still offer open sky views. National forests, state parks, and Bureau of Land Management areas often have miles of trails that see little traffic after dark. Weeknights are even quieter than weekends.
If you want to escape the crowds entirely, check out our tips for how to find solitude on popular hiking trails. Many of those strategies, like going midweek or choosing less famous trailheads, work even better at night.
Timing Your Night Hike for the Best Stargazing
Timing is everything. The best stargazing happens when three conditions align.
First, the moon should be below the horizon or in a thin crescent phase. Use a moon phase calendar to pick your date. Second, the weather should be clear with low humidity. High clouds or haze will scatter light and dim the stars. Third, you want to be at your viewpoint during astronomical twilight, about ninety minutes after sunset or before sunrise.
Arrive at the trailhead at least thirty minutes before sunset. That gives you time to hike to your stargazing spot while there is still enough light to see the trail. You can enjoy the sunset colors, then watch the stars emerge as darkness settles in.
For trails known for their sunrise and sunset views, our article on 10 iconic hiking trails for sunrise and sunset views can double as a stargazing guide. Many of those trails have open western or eastern exposures that work well for night sky viewing too.
How to Prepare for Your Night Hike
Preparation for a night hike goes beyond just choosing a route. You need to set yourself up for success before you leave the house.
Charge your headlamp and pack spare batteries. Test your light at home, not at the trailhead. Bring red light mode if your headlamp has it, because red light preserves your night vision better than white light.
Dress in layers. Synthetic or wool fabrics work best. Avoid cotton, which stays wet and cold. Pack a lightweight insulating layer even if the afternoon feels warm.
Bring more water than you think you need. It is easy to underestimate how much you drink when the air is cool. Dehydration affects your judgment and coordination.
Carry a paper map and a compass, even if you have GPS on your phone. Electronics fail. Batteries die. A paper map does not need a signal.
If you plan to do longer night hikes in the future, our ultimate guide to choosing the perfect hiking trail for your adventure covers terrain types, difficulty ratings, and seasonal factors that apply to both day and night trips.
Your First Night Hike: A Sample Plan
If you want to go night hiking this weekend, here is a simple plan to follow.
Choose a loop trail that is one to two miles long with less than 300 feet of elevation gain. Pick a night with a new moon and clear forecast. Arrive at the trailhead one hour before sunset. Hike the trail in the last light of day so you can see the path and notice landmarks. Reach the open viewpoint as the sky darkens. Sit down, turn off your headlamp, and watch the stars for twenty or thirty minutes. Then turn your light back on and hike back to the car.
That is all it takes. A short, intentional, and safe introduction to night hiking.
Make Your Night Hike a Regular Adventure
Night hiking is not just a one time experiment. It is a skill you can build over time. Each trip teaches you something new about how your senses work in the dark, how your gear performs, and how the landscape changes after sunset.
Start with familiar trails. Add distance slowly. Try different trail types as you gain confidence. Before you know it, you will have a list of go to routes that work perfectly for stargazing.
The stars are waiting. Pick a clear night, choose a trail that meets the criteria we covered, and head out with a headlamp and a sense of wonder. The darkness is not something to fear. It is a different way to see the world.

Leave a Reply