
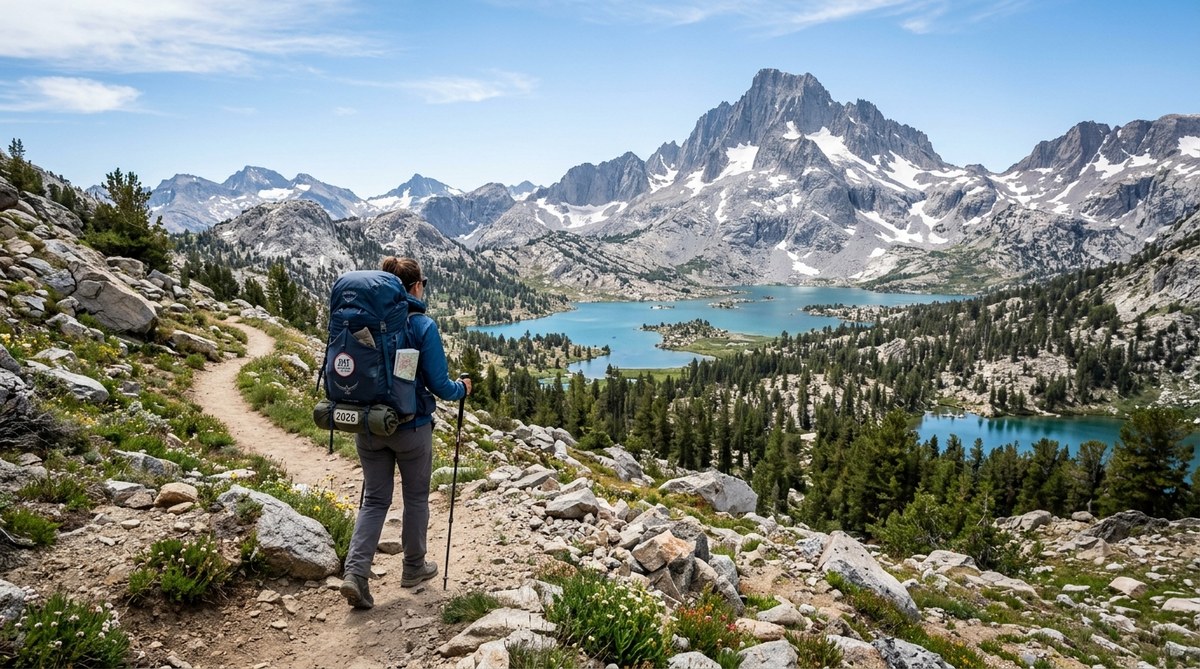
The John Muir Trail is one of the most rewarding long distance hikes in the United States. It stretches 211 miles from Yosemite Valley to the summit of Mount Whitney, crossing some of the most dramatic alpine terrain in the Sierra Nevada. But planning a JMT thru-hike takes serious preparation. The permit process alone can trip up experienced hikers if they do not know the rules. The 2026 season brings updated quota systems, changing snow patterns, and new resupply options. This guide lays out everything you need to know to plan a safe, legal, and unforgettable trip.
Planning a John Muir Trail thru-hike in 2026 requires nailing four things: a permit from Yosemite or Inyo National Forest, a gear list built for Sierra weather swings, a resupply plan that keeps your pack light, and a start date that avoids peak snowmelt. Start your permit application in January. Train with a loaded pack on steep terrain. Your reward is two weeks of pure Sierra granite.
Why the JMT Deserves Your Attention in 2026
The John Muir Trail passes through Yosemite, Kings Canyon, and Sequoia National Parks. It also crosses the Ansel Adams and John Muir Wilderness areas. You will hike past Mount Ritter and Banner Peak, over Muir Pass, and down into Evolution Valley. The trail stays above 8,000 feet for most of its length, and the highest point on the JMT is Trail Crest at 13,600 feet.
Every year, thousands of hikers apply for permits. Only a fraction get them. The 2026 season is expected to be even more competitive because of growing interest in long distance hiking in the United States. If you want to secure a permit, you need to understand the system now.
If you are still deciding whether the JMT fits your skill level, take a look at our guide on how to evaluate a hiking trail’s difficulty rating to compare it with other iconic trails.
Understanding the 2026 Permit System
The JMT permit process changed in 2024 and remains similar for 2026. You have two main options.
Option 1: Start in Yosemite National Park (Most Popular)
About 70 percent of JMT hikers start in Yosemite Valley. You need a wilderness permit from Yosemite with a Happy Isles to Little Yosemite Valley exit. These permits go live on Recreation.gov on the last Sunday in January at 7 AM Pacific Time. For 2026, that date is January 25.
You need to apply for a specific start date. The daily quota for Happy Isles to Little Yosemite Valley is limited. If you do not get your preferred date, you can try for Donohue Pass exit permits through Inyo National Forest. These allow you to start from Tuolumne Meadows instead.
Option 2: Start from the South (Whitney Portal)
If you want to hike south to north, you need an Inyo National Forest permit for the Whitney Portal trailhead. These are also available on Recreation.gov. The quota is smaller, but fewer hikers apply for this direction.
Key Dates for 2026 Permits
- January 25, 2026 at 7 AM PT: Yosemite wilderness permit applications open for summer 2026.
- February 2026: Inyo National Forest releases 40 percent of their permits on a first come, first served basis. The remaining 60 percent are available 14 days before each start date.
- March 1, 2026: Recommended date to finalize your resupply strategy after securing your permit.
Blockquote: “The single biggest mistake JMT applicants make is not having a backup date. Apply for three different start windows. Your odds of getting one permit jump from 20 percent to nearly 60 percent.” – Ranger Sarah Kendall, Yosemite Wilderness Office, 2025 season data.
If you are new to multi-day hikes in national parks, our guide on top tips for planning a safe and enjoyable trail hike covers the general principles that apply to JMT preparation.
Choosing Your Start Date: Seasonal Timing for 2026
The JMT season runs from July through September. Snowpack in the Sierra Nevada determines when the trail becomes passable. In 2026, forecasters predict a near normal snow year based on current climate models. That means the trail should open by early July in most sections.
Monthly Breakdown
| Month | Conditions | Pros | Cons |
|---|---|---|---|
| Late June | High snow, creek crossings dangerous | Fewer crowds, wildflowers | Route finding required, crampons needed |
| July | Snow melting, trail muddy | Best wildflower display, full daylight | Mosquitoes at peak, wet gear |
| August | Trail mostly dry, stable weather | Ideal hiking conditions, clear passes | Higher permit competition, warmer temps |
| September | Cool days, possible early snow | No bugs, quieter trails | Shorter days, risk of storms |
| October | Unpredictable, first significant snow | Solitude, fall colors | Passes may close, colder nights |
For most hikers, starting between July 10 and August 15 gives the best balance of conditions and fewer logistical headaches.
Gear Strategy for Sierra Conditions
Your gear list for the JMT in 2026 needs to handle one thing above all else: temperature swings. You can wake up to 30 degrees in a high basin and hike in a t-shirt by noon.
The Core Four
- Shelter: A trekking pole tent like the Zpacks Duplex or a freestanding tent such as the Big Agnes Copper Spur. Both handle wind well above treeline.
- Sleep system: A 20 degree quilt or bag. The Katabatic Flex 22 or Enlightened Equipment Enigma work well. Pair with a NeoAir XTherm sleeping pad.
- Pack: Aim for 50 to 60 liters. The ULA Circuit or Osprey Exos 58 are common choices on the JMT.
- Stove: An isobutane canister stove like the MSR PocketRocket 2. Fuel canisters are available at resupply points.
Clothing Checklist
- Base layer (merino wool or synthetic)
- Mid layer (Patagonia R1 or similar)
- Insulation layer (down jacket, 800 fill or higher)
- Rain shell (lightweight, pit zips)
- Hiking pants (convertible or zip off)
- Sun hat and beanie
- Gloves (lightweight for cold mornings)
- Hiking socks (two pairs, rotate)
Footwear
Most JMT hikers use trail runners for the 211 miles. The Brooks Cascadia, Hoka Speedgoat, or Altra Olympus are popular. If you have weak ankles, consider lightweight boots like the Salomon X Ultra 4. Gaiters help keep granite dust out of your shoes.
For a deeper look at what to bring, check out our guide on essential outdoor gear every hiker should pack for long trails.
Resupply Strategy for the JMT
You cannot carry food for 211 miles. The JMT has well established resupply points. Most hikers plan two or three resupplies.
Standard Resupply Points
- Tuolumne Meadows (mile 22): Post office and store. Pick up your first resupply here.
- Red’s Meadow (mile 60): Resort with a store and hot meals.
- Mammoth Lakes (mile 60, via shuttle): Full grocery stores and gear shops. Some hikers skip Red’s Meadow and resupply here instead.
- Vermilion Valley Resort (mile 92): Boat access only. Great burgers and a bucket list stop.
- Muir Trail Ranch (mile 110): Bucket resupply. You need to mail your food bucket ahead of time.
- Independence (mile 160, via Onion Valley trailhead): Walk in or arrange a shuttle.
How to Plan Your Resupply
- Calculate your daily calorie needs. Most hikers burn 4,000 to 5,000 calories per day on the JMT.
- Divide total food needed by the number of days between resupply points.
- Pack each resupply bucket or box. Label clearly with your name and expected arrival date.
- Mail buckets to Muir Trail Ranch by June 1 for July arrivals. Late shipments may be refused.
- Use flat rate boxes for post office resupplies. They are cheaper and predictable.
- Include a backup meal in each bucket in case you arrive early or late.
A common mistake is overpacking food at Muir Trail Ranch. You will be tired by mile 110. Pack lighter meals that are easy to prepare. Dehydrated meals, tortillas, peanut butter, and instant oatmeal work well.
Training for the JMT in 2026
The JMT has about 47,000 feet of cumulative elevation gain. That is the equivalent of climbing Mount Everest from sea level one and a half times. You need to train specifically for this.
Training Plan (12 Weeks)
- Weeks 1 to 4: Build a base. Hike 10 to 15 miles per week on rolling terrain. Add a loaded pack (20 pounds).
- Weeks 5 to 8: Increase elevation. Find a local hill or stadium stairs. Do one session per week with 2,000 feet of climbing while carrying 30 pounds.
- Weeks 9 to 12: Back to back long days. Hike 15 miles on Saturday, then 12 miles on Sunday with a full pack. Your body learns to recover while moving.
Strength Work
- Squats and lunges (bodyweight then weighted)
- Calf raises
- Planks and side planks
- Pull ups or rows for upper body
You do not need to be an elite athlete. But you should be able to hike 10 miles with 2,000 feet of gain while carrying 30 pounds before you start the JMT.
Navigation and Safety on the Trail
The JMT is well marked, but navigation skills matter. Snow can obscure trail signs in early season. Fog and afternoon thunderstorms reduce visibility.
Navigation Tools
- Guthook Guides (FarOut): The most popular app for JMT hikers. Download all maps and waypoints before you leave.
- Paper map: The Tom Harrison JMT map set is waterproof and reliable. Keep it in an accessible pocket.
- GPS watch: A Garmin Fenix or Coros Vertix helps track your progress. Carry extra charging capability.
Safety Considerations
- Altitude sickness: The JMT starts at 4,000 feet and climbs above 13,000 feet. Spend a night at Tuolumne Meadows (8,600 feet) before heading over Donohue Pass. Know the symptoms of HACE and HAPE.
- Lightning: Afternoon thunderstorms are common in August. Be below treeline by 1 PM. If you are caught on an exposed ridge, drop your pack and squat on your sleeping pad.
- Water crossings: Early season crossings of Bear Creek and Evolution Creek can be dangerous. Cross early in the morning when water levels are lowest. Use trekking poles for stability.
If solitude is important to you, take a look at our guide on how to find solitude on popular hiking trails. It includes strategies for avoiding the busiest sections of the JMT even in peak season.
Common Mistakes and How to Avoid Them
Even experienced hikers make errors on the JMT. Here are the most frequent ones and what to do instead.
- Starting too early: July 4 weekend looks tempting, but snow on Muir Pass and Forester Pass can force a turnback. Be honest about your snow skills.
- Underpacking for cold: A 40 degree quilt might work in August on the PCT, but the Sierra dips below freezing in any month. Bring a 20 degree bag.
- Skipping the bear can: You need a bear resistant food canister for the entire JMT. The BV500 or Ursack Major are standard. Rangers check at trailheads.
- Not training with elevation: If you live at sea level, plan two acclimatization days in Mammoth Lakes or Tuolumne Meadows before you start.
- Overplanning mileage: The JMT has tough terrain. Plan for 10 to 12 miles per day in the first week. You can increase to 14 to 16 miles later.
The JMT Experience: What to Expect Each Day
A typical day on the JMT starts around 6 AM. You boil water for coffee and oatmeal while packing your gear. By 7 AM you are walking. Morning light on the granite walls is stunning. You stop for a snack at 9 AM, a longer lunch near a creek at noon, and reach camp by 4 or 5 PM.
You will cross high passes almost every day. Each one offers a view that feels earned. You will share the trail with other hikers, but there are long stretches where you see no one. The sound of wind through lodgepole pines and the crunch of granite under your boots become your background music.
Blisters, sore knees, and hunger are part of the experience. But so are sunsets over the Palisades and the feeling of dropping your pack at the end of a 12 mile day.
If you are looking for other trails with similar grandeur, our list of the top 10 must-visit hiking trails in the U.S. for 2026 includes several Sierra alternatives worth considering.
Your 2026 JMT Checklist
Here is a bullet list of everything you need to do before you step onto the trail.
- Apply for a Yosemite or Inyo permit on Recreation.gov in January 2026.
- Book a room at the Tuolumne Meadows Lodge or a campsite for your first night.
- Order a bear canister. Rent one from Yosemite if you do not want to buy.
- Prepare three resupply buckets. Mail them by June 1.
- Download FarOut maps for the JMT. Test your GPS before you go.
- Train with a loaded pack on steep hills for at least eight weeks.
- Pack a first aid kit with blister care, ibuprofen, and electrolyte tablets.
- Arrange a ride from Whitney Portal to Lone Pine. The Lone Pine Chamber of Commerce lists shuttle services.
- Leave a detailed trip plan with a friend or family member. Include your expected daily campsites.
Finding Your Own Pace on the Sierra Crest
The John Muir Trail is not a race. It is a journey through one of the most beautiful mountain ranges in the world. The planning process can feel overwhelming at first. Permits, gear lists, resupply schedules, and training plans stack up fast. But every step you take in preparation makes your time on the trail smoother.
Start with your permit application in January. Build your gear list around the Sierra conditions. Train consistently through the spring. By the time you step onto the trail at Happy Isles, you will be ready.
The 2026 season is waiting. Use this John Muir Trail planning guide as your foundation, adjust it to your style, and get out there. The granite will still be there. You just need to show up with a good plan and a light pack.

Leave a Reply