The usual direction for the route described in books is from Holdsworth to Kaitoke - this makes the steepest part of the track into an abrupt descent. However travelling from Kaitoke gives the advantage of ending up at the Holdsworth road end with its telephone to call for onward transport.
Access
From Kaitoke on SH2, the road end is up Marchant Road (past the youth hostel). From Masterton, the Mt Holdsworth Road departs SH2 just south of the town.
Kaitoke to Tutuwai Hut
Drive out from Upper Hutt to the top carpark at the end of the Marchant Road (which leaves State Highway 2 just before it starts to climb over the Rimutakas). The tarmac on this road runs out about 500 metres before the carpark at a smaller carpark and the Kaitoke Shelter - a sturdy, three-sided structure that is useful when waiting for outward transport.
The wide dirt track heads up the ridge from a new DOC sign and reaches a stand of pine trees. There is a track from the Kiwi Ranch youth camp joining here (cars may be left here for a donation - much safer than the carpark which is prone to vandalism). The graded track enters regenerating bush and sidles around spurs for 20 minutes to the turn-off to Marchant Ridge. Continue straight on to climb gently onto Puffer Saddle (480m) in 10 minutes where there is a flat cleared area. Take a last glance at the civilised farmlands around Kaitoke then turn your back and head north into the wilderness. Strangely neither of the hill-tops at the saddle is called Puffer - it is the flat topped hill a little bit to the south.
Beyond the saddle, the track descends gently along the side of a ridge over Smith Creek with a few views through the shrubbery to the winding green-clad Tauherenikau Valley. An eroded zigzag down a spur leads to a minor headwaters of the creek and more mature bush (15 minutes from the saddle).
The main track crosses the creek, climbing easily and then descending, remaining a fair distance above Smith Creek. There are no difficulties aside from one active slip where the path has been wiped out - just scramble down to the foot of the slip, cross it and regain the path. A few sidestreams are crossed before a fine stand of trees on level ground brings the often dry Canyon Creek (about an hour from the saddle). Just before the creek, a side track up to the old Dobson Shelter site is passed. Smith Creek Shelter is just off the main track a few metres past Canyon Creek. This sturdy structure is still used for overnight stays with its two bed platforms sleeping about 20 (water from the river, toilet nearby, no fireplace or other heating).
There is a good track all the way up the Tauherenikau Valley from the shelter to the next hut. It is even relatively flat with only a few climbs to get over river bluffs. There are several streams that may be uncrossable for some hours after heavy rain but they are quick to subside. The most flood-prone stream (Marchant) has a wire rope across it to make fording a bit safer. About 3 hours of travel will get you to Tutuwai Hut (4-5 hours from the road-end) though on a fine day there will be plenty of excuses for slower progress.
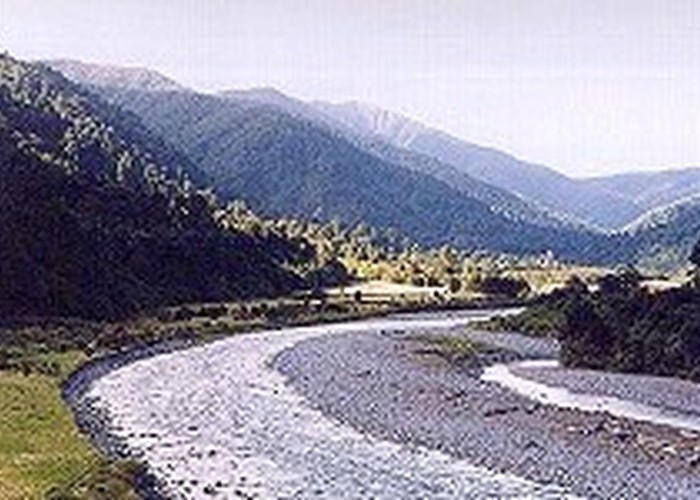
An alternative is to walk up the river - a bracing and wet choice for a fine summer's day. In the middle of spring, the water is even more bracing (ie. icy cold) and the going is wetter (thigh deep rather than knee deep). The river is reached through scrub and a couple of campsites to the east of the shelter. At this point it is taking a wide sweep - making a 90 degree turn to flow through the lower Tauherenikau Gorge and out onto the Wairarapa Plains. The result is a wide stretch of gravel deposited in various floods and a lot of riverbank erosion (the large boulder in the middle of the river used to be nestled against the bank in 1995).
The first kilometre up the river is easy with few and shallow crossings together with nice boulder and gravel banks. You will see plenty of deer sign in the many sandy patches. When Marchant Stream is reached (pause to look up the stream and note the wire where the track crosses it), there is the first serious ford as you cross to a small river flat formed by an S-bend in the river. This contains a couple of good camping sites. The upper part of the bend is a bit of a hassle as the river is fast, deep and fills its bed from bank to bank. You may find it easier to bash through the bushes on the bank top for 20 metres or so and then rejoin the river.
The next 2 kilometres up to Blue Slip holds the riskiest crossing of the day just above Boulder Stream. Here the river takes an abrupt turn with some fine big rocks on the southern bank. There are some good rapids upriver but the problem is that the river is squeezed between rocky banks. The water will be deep and fast even in summer so take care when fording. If you are especially quiet then you may see deer in the arc of river flats (an old river course) across from the slip.
Above Blue Slip, the river snakes in a NE direction and then turns to the north as it approaches a footbridge (older maps show the bridge in its original position about 500 metres further upriver). Drier progress is found up the river's east bank. You can leave the river here to rejoin the track for 10 minutes but the big bend ahead can be negotiated with a couple of careful crossings.
The river beyond Slip Stream has bored a channel through a band of blue rock. The bank provides fine and dry progress on the rocky shore for about 100 metres until the usual gravel banks resume. A couple or three fords will get you up to the river flats where Tutuwai Hut (sleeps 20) is just visible on its high river terrace (about 30 minutes from Slip Stream).
Over Cone Saddle to Totara Flats
The track upriver mostly traverses grassy flats and bush terraces with plenty of muddy patches. There is a short rough sidle about 40 minutes from Tutuwai Hut where the track is forced away from the river. The next river flats (arrived at in 10 minutes from the sidle) provide good camping and the hut is another 4 minutes away after a climb up through bush-clad terraces. There is a signpost at the flats showing the way to the Bull Mound Track which starts on the other side of the river and slightly downstream of a slip. This is the modern end to the Bull Mound Track. The track was originally constructed by the Greytown Mt Hector Tourist Club as a packhorse route over Mt Reeves to a bridge across the Tauherenikau and then up an easy spur to Bull Mound, Alpha and beyond. Good bush navigation practice can be had by following the old track. Cone Hut is a great little hut and well sited for a morning break. Have a look around this prime example of bush carpentry (renovated in 1989 but using old techniques) with its totara slab walls and dirt floor. Past the hut the track takes a direct route up the slopes by a stream. After a climb of 70m, it ducks down to cross the stream and rises again. Between here and the next stream crossing there is another track that heads directly up a ridge to join the Cone Saddle to Waiohine River track (a useful short-cut if walking in from the Wairarapa). After the second stream there is a steady 30-45 minute plod up to the saddle at 566m - there is a total climb of 226m in about a kilometre. The saddle is a minor crossroads with the Cone Saddle Track continuing on north to Totara Flats, the track to the Waiohine River heading east and the Neill-Winchcombe Route climbing west to Cone (and beyond).
Continuing north, the track zigzags down the side of one spur before crossing to the left over the headwaters of a creek and sidling near the 500m contour to Clem Creek (about 35 minutes from the saddle). Some parallel tracks develop near the creek but all end up at the same point. Cross the creek to the broad gravel bank on the other side. This is a good spot for lunch, a rest and perhaps some sunbathing. The track leaves the creek about 50 metres upstream next to a rusty iron standard - there are three red triangles on a log lower down pointing the way. A broad gully is followed for 10 minutes up to a small saddle where there is an obvious right angle turn to the SE.
Another 15 minutes of easy climbing (some mud) brings the broad top of the knob at point 572. This is recognised by the sharp turn that the path takes to the north and the fine tree at the corner. More mud appears as the track heads down a sharp little ridge and then steepens in its descent to the Waiohine River terraces. Near the bottom there are good views down into the wild Makaka Creek just before the track from Walls Whare to Totara Flats is met. From the junction, the track drops 30m down some small terraces and then turns left to descend sharply from the major river terrace to meet Makaka Creek. This point is about an hour from the previous saddle (45 minutes from point 572).
Crossing Makaka Creek should not be taken lightly since it carries a large volume of water and plummets rapidly to the river. The best ford is about 30 metres up from the river, just above a large boulder. The track resumes on the other side of the creek but nearer to the river edge. When the level of the Waiohine River is low, it can be followed all the way up to Totara Flats Hut. The track firstly clambers through some large boulders on the river edge and then follows flatter ground near the river
Soon the track climbs a bit onto a bush terrace but comes to an sudden halt about 30 minutes from Makaka Creek. Here a large slip forces a scramble down a loose bank to the river where a clamber over riverside rocks normally allows you to get to the foot of the slip with dry boots. In flood conditions, you may have to continue along the very lightly padded track for a high level (and risky) sidle above the slip. All active slips have to be treated with caution - beware of falling rocks and trees especially in wet weather. Once past the slip, a gravel bank leads to a pleasant grassy river flat with great camping. The track is officially rejoined at the flat's north end for a climb up 30m to the lip of a terrace overlooking Totara Flats. This offers one of the most striking views in the Tararuas with the flats pointing the way to High Ridge and Mt Holdsworth outlined against the sky. The terrace edge is followed for a few minutes before a sharp drop down to the flats.
There is an obvious track trod into the long grass crossing the flats. However at one point it is taken over by a stream and it also needs a couple of leaps over the deep trenches of creeks. Take care on the flats - when they were formed by flood debris, many totara trees were buried. A few rotting stumps are still visible but the majority have rotted away leaving 2 metre deep holes in the ground. A better alternative is to angle over to the river edge and follow that up to the slopes below Totara Flats Hut (sleeps 35) nestled in trees. There is a fair ford across the river here and a track in the bush beyond leading to the interesting Sayer Hut. Sayer held grazing rights over Totara Flats until the late 1940's and the hut was built to service these. Cattle were driven up Totara Creek and over the old Gentle Annie Track which explains why this track is wider than most (and the heavy erosion in places).
Out to the Holdsworth road end
The track leaves the door of the hut and wanders around the treeline to head north to the wide gravel delta of a stream draining Cone Ridge. On the other side, it crosses more grassy flats for 5 minutes before entering bush. The manuka provides a little shelter from any rain as the track proceeds on sometimes muddy ground. About a minute from the river the site of the old Totara Flats Hut is passed (just the concrete fireplace remaining) and then the footbridge is reached - about 20 minutes from the hut. This is marked as a cableway in older maps. Large parties can save time in low water by crossing a ford near the bridge.
A minute up the track from the bridge there is a cairn next to the track. This marks the route up to Flaxy Knob, High Ridge and Mt Holdsworth. Remain on the track up the northern bank of Totara Creek. Easy going (with one squeeze through rocks) persists for about a kilometre until nearing Red Rock Creek where the track heads away from Totara Creek. Don't be fooled by the padded route continuing across a small creek - this comes to a stop a few metres further on (possibly useful as a very low water route up Totara Creek itself). The main track scrambles up a tree-root bound bank to a high terrace which is followed to Red Rock Creek. A shingle bank is then climbed sharply to an ancient flood delta of the creek and the reward of a magnificent grove of giant rimu. The trail soon returns to the creek side and continues upstream.
Another three notable side-streams are crossed, the first about 10 minutes from Red Rock Creek, the next one about an hour from the Waiohine footbridge (30 minutes from the creek) and the last a further 7 minutes on. The crossing of Totara Creek is another 8 minutes away (75 minutes from the bridge) through open flood-damaged bush. Go straight across the creek to a red disk on a tree. Do not travel upstream further than the small stream joining on the true left (other side). The track now climbs to a small terrace and then up some very rough and eroded zigzags. In about 10 minutes of panting, the saddle between Totara and Carrington Creeks is reached (less than 100m climbed from the creek). The track widens out and becomes steeper - this is the old cattle trail from Totara Flats into the Wairarapa. Another 20 minutes of constant ascent brings an abrupt change in the bush. The mature forest trees cease and are replaced by younger trees at the lower reaches of a pre-European fire.
The top of the climb is found about 45 minutes from the creek crossing just after a sidle on a shelf to the left. The track then swings to the right for a muddy sidle for 10 minutes to the Gentle Annie Track to Mt Holdsworth. The branch to the left climbs for a few minutes to the top of Pig Flat and a clearing that provides a good view back down to Totara Flats. Return back to the junction where it takes 75 minutes to get to the Holdsworth road-end along this well-graded and easy track.