Tararua main ridge
- 4 – 8 days one way
- Medium
The length of the tracked Tararuas along the main ridge from Mangahao (behind Shannon) to Kaitoke.
For a 'Total Tararua Traverse from Woodville to the Rimutaka Hill Rd summit, see the separate article under that name.
|
Walking time
|
4 – 8 days |
|---|---|
|
Distance
|
88.0km |
|
Type
|
One way
|
|
Grade
|
Medium |
|
Bookings
|
No bookings — open access
No — open access
|
|
Starts
|
Mangahao Dam No 2 (Shannon) |
|---|---|
|
Ends
|
Kaitoke |
|
Maps
|
NZTopo50-BN33
NZTopo50-BP33 NZTopo50-BN34 |
|
Altitude
|
200m
–
1,529m
Altitude change 1,329m
|
Introduction
This is a 4+ day walk running the full length of the (tracked) Tararuas, following the ridgeline all the way.
The thick leatherleaf and an unmaintained route on the northern section (Burn Hut to Herapai) of the walk has been cleared somewhat in recent years, but is still a challenge. This can be partially bypassed by descending to Barber Forks and either climbing the Puketurua Track, or following the main Mangahao Valley to Te Matawai Hut, rejoining the walk at Arete.
Minimum times show how long it took me - I've doubled them for the maximum - a rule of thumb which should give something close to DOC signposted times.
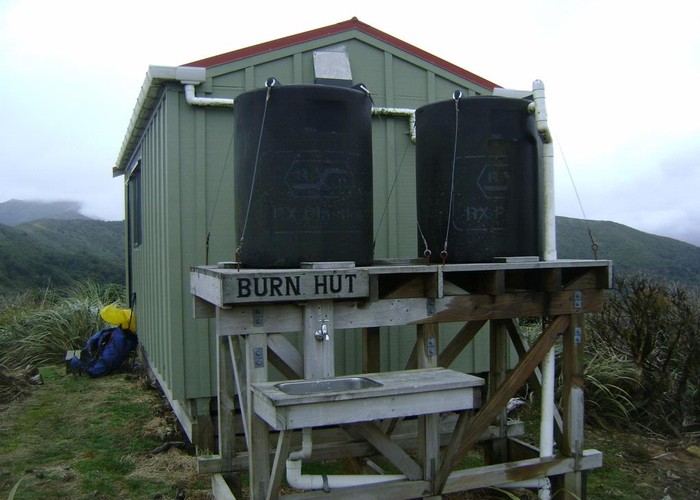
Mangahao to Burn Hut (the night before!)
5km (1.5 - 3 hours)
The walk starts at the Mangahao Lower No. 2 dam (272120, 606410), 14km from Shannon along the Mangahao Road. From the far side of the dam follow the clearly marked track down the Mangahao River before climbing through first beech and then leatherleaf to the Tararua Ridge, which it then follows SSW to the new Burn Hut. The track is recently cut and well marked: I walked in in twighlight on a friday evening after work - and the track is ideal for a nighttime walk.
Burn hut to Dundas Hut (day 1)
Burn Hut to Ruapae
9.5km (6 - 12 hours)
The ridgline from Burn to Dundas used to be one of the leatherleaf nightmares of the Tararuas. However, recent recutting by volunteers has improved it somewhat.
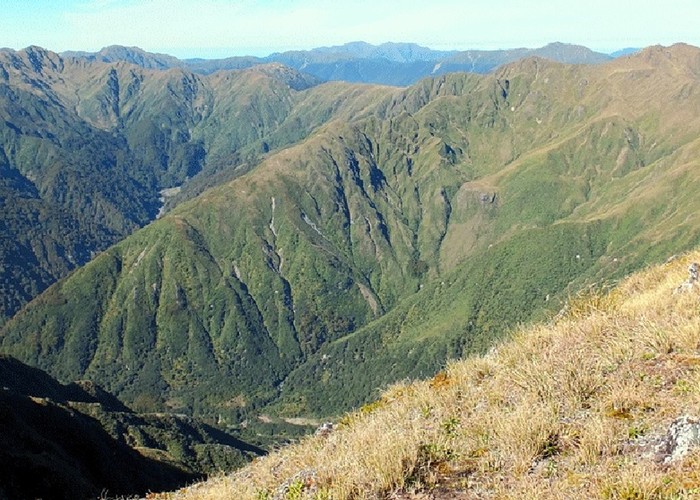
Heading north from Burn the track climbs SE to over 800m, before swinging south-west down the range. After a couple of km it swings west and starts to drop to the saddle towards pt835. Just before the final drop to the saddle, flagging tape round a DOC marker-post marks the start of the route to Herepai and Dundas. This track had become overgrown over the years, but was recut in 2013 – however, it’s still far below DOC standard.
A marked, lightly trimmed route through tussock and low leatherleaf runs south along the tops to the 1st saddle, after which it sidles the western face, still as a route. Where the thick leatherleaf starts, a good cut track begins – the start was marked with flagging tape, but that will probably not last. This track cuts from the western face onto the top of the ridge, before dropping east out of the leaftherleaf into taller scrub to sidle that side of the ridge. Once on it the track is fairly clear. Beyond the 2nd saddle, and back on the east face, the track stops at the base of a short gut, and we scramble 10m up that back onto the tops. The thick leatherleaf is now behind us, and ahead is a rising ridgeline of tussock, tangled with a brittle, knee-high scrub. Bring the gaiters.
You are pretty much left to your own devices for the next 800m over pt840, to where the leatherleaf becomes bad again. Sidling just below the ridgeline on the west, you can again pick up a cut track cutting across the ridgeline to the east, sidling briefly there, then returning to the ridgeline itself where a good cut track winds all the way to the junction with the Puketurua Track.
From here the track is generally more obvious – cut on the ridgeline or sidling high on the western face. There are a few tussock clearings, and relocating the track afterwards can be an issue. Finally however the cut track climbs to Ngapuketurua, heads east along the ridgeline from there to a small tarn, and stops (2014). This leaves 500m through intermittent waist-high leatherleaf to Massey Knob.
Heading south, we’ve pretty much left the leatherleaf behind - good open ridgelines south over Kareti and Hines on a vague ground trail. The saddle between Hines and Rupae, however, is again thick with knee-high scrub and not much fun.
At Rupae, the cairn-marked track from Herepai Hut joins from the east. For those wishing to spend the night, Herapai Hut is on the ridgeline 2km (30-40 mins) down this track - a rapid descent to 700m, but a harder climb in the morning!
Ruapae to Dundas Hut
7km (2-4 hours)
From Ruapae a clear route follows the ridge, climb sleadily to East Peak (1355m). Heading due west here, the Tararuas play a mean trick (to be repeated many times) with a steep descent of over 200m to the saddle between East Peak and West Peak (1335m). Throw away all that hard-earned altitude: dream of suspension bridges.
Up high, amidst the tussock, on a narrow ridgeline traversing rocky peaks, it really feels as if we’ve reached the Tararuas at last. From West peak, heading SW again, a series of climbs and descents follow as the ridge crosses a series of peaks and saddles: Walker (1392m), Pukemoremore (1474m) and pt1415. Here a DOC signpost points east to Dundas Hut, clearly visible clinging to the hillside 150m below - the end of a hard, long day from Burn Hut. Follow the signposted track east down the side-ridge, to where a further signpost point off the north side dropping steeply to Dundas Hut.
Dundas Hut to Andersons Memorial Hut (Day 2)
Dundas Hut to Arete
6km (2-4 hours)
From Pt1415 above Dundas Hut, the well-trodden (but unmarked) track continues SW with sharp climbs and descents to Logan (1500m) and Mt Dundas (1499m). Care is required in bad weather on Mt Dundas to select the correct ridge: from the trig point head at 185o, dropping steeply, and avoiding the more obvious ridge which continues a short distance SW before ending in bluffs.
From Dundas the ridge continues at 185o, climbing and falling over a series of small peaks (pt 1437 and pt 1424 being the only ones marked on the map) before a final steady climb to Arete Peak. The hi-viz orange Arete Biv is visible on the left, on a plateau 60m below the ridge before the final climb to Atete Peak - but cannot be seen from the peak itself.
Arete to Dracophyllum Hut
6.5km (2.5 - 5 hours)
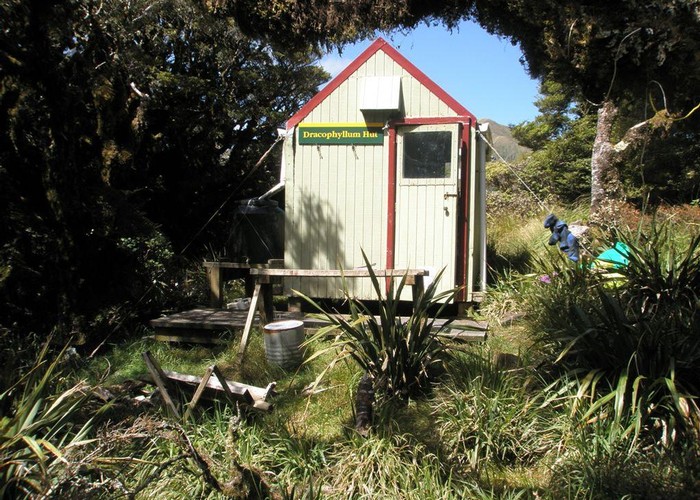
From Arete Peak the walk picks up marked tracks again. Cairns and poles mark the route west to Pukematawai, where a DOC signpost indicates the track NW to Te Matawai Hut, and south to Dracophyllum Hut. Continuing south on the main ridge, the recently cut track drops and swings west scrub-line. Slight climbs are required for pt1217, pt1180 and pt1158, but the general pattern is descent until the bushline is reached. Once in the bush, however, the main ridge resumes its sawtooth norm, and climbs and falls sharply over pt 1070, pt1090 before reaching the damp Dracophyllum Hut at Dracophyllum Knob (1117m).
Dracophylum Hut to Nichols Hut
6.5km (2.5 - 5 hours)
Leaving Dracophylum Hut, nothing much changes - the well-cut track continues to climb and fall through mossy cloud-forest and ocasional scrubby peaks: pt 1033, Puketoi (1152m), Kelleher (1182m), pt1055, and pt1031 - before commencing the long and steep climb to Nichols, where the track swings sharply west. In bad weather (I had mist and horizontal rain) it is very hard to pick up the point where the track turns: a well-trodden track (presumably made by lost trampers) continues south along the ridge which then drops sharply towards the Waiohine. Nothing obvious marks the turning point - so look out for a worn track branching due west.
About 500m after turn at Nichols Peak, a signpost indicates Nichols Hut below on the left (south) side of the ridge.
Nichols Hut to Anderson Memorial Hut
8km (2.5 - 5 hours)
From Nichols, the track continues west, climbing and falling through scrub, rock and tussock over pt 1276, pt1240 and pt1345, where it swings gently to the south, still climbing to Mt Crawford (1452m) - from where its (almost) all downhill. 1km south of Crawford is Junction Knob (1375m), where a signpost indicates the descent to Waitewaewae Hut. A well word track continues south, marked by caurns and poles over pt1356, and down to the tarns, following a muddy plateau to reach the well-maintained Anderson Memorial Hut where the bushline meets the main ridge. This was the end of my second day - and a very welcome sight in strong biting southerlies and rain.
Andersons Memorial Hut to Kime Hut (day 3)
Andersons Memorial Hut to Maungahuka Hut
10km (4-8 hours)
From Anderson's Memorial Hut, follow the well-marked, recently cut track south through the bush along the ridgeline. Going is at first easy through the bush, but become increasingly difficult with steep climbs requiring hands and feet, and making full use of vegetation to pull yourself up the steepest bits. Beyone kahiwiroa (1320m) the ridge narrows, but is still negotiable in all but the worst weather. At Aokaparangi, a signpost indicates a track to a bivvy 1km SSE on the bushline.
The marked track continues along the narrow ridge crossing Wright (1196m) and Simpson (1174m) before the ridge broadens and climbs to the tarn at the new, cold, draughty Maungahuka Hut.
Maungahuka Hut to Kime Hut
Warning: The section between Maungahuka Hut and Kyme is very exposed, steep and narrow. The topography funnels winds through this low section in the Tararuas, and so wind speeds here are likely to be much higher than elsewhere. This section is not recommended in anything more than light to moderate winds. Escape routes exist down marked tracks to Niels Forks Hut and Penn Creek Hut, and the ridge north of Vosseler (270360, 602870) also appears to offer a reasonable descent to Penn Creek Hut if required.
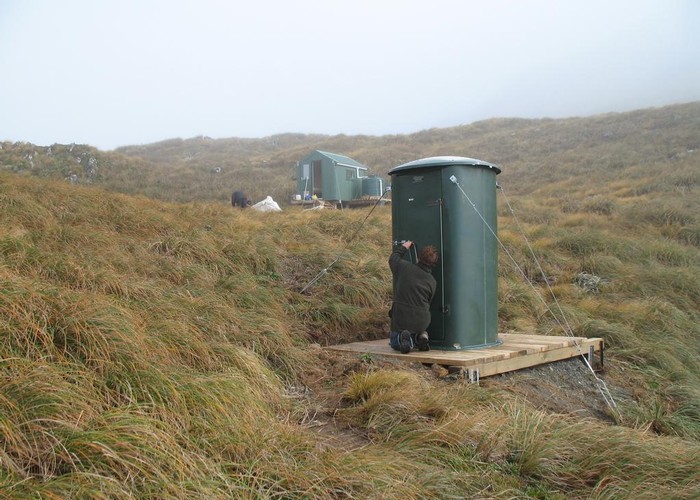
From Mangahuka return to the ridge and track (don't follow the triangles south from the hut, they lead only to the toilet!), and climb south to Maungahuka Peak. A track leads south from here dropping to Neils Forks Hut and on to Cone and Totora Flats Hut.
The ridgeline track, however, heads due west from Maungahuka Peak, dropping steeply to the base of the Tararua peaks. At the first peak (Tunui), the track heads briefly west along a side-ridge before cutting back east to a new rigid ladder used to climb Tuiti. Below the ladder, wire-ropes provide some support crossing the steep slopes - but should not be requred unless snow is present. After climbing the ladder, things get difficult. From the top of the ladder, scramble right (south) to the top of Tuiti, following the steel eyelets that once held a supporting rope. Try not to think of the drop below!
On reaching Tuiti, the rock climbing is over, but the ridge remains narrow and wind gusts are still be a danger. 1km east of Tuiti, a route (no longer maintained) heads north, dropping to Penn Creek Hut. The main ridge, continues south-east, sawtoothing over McIntosh (1286m), Yeates (1205m), Yosseler (1198m), and Boyd Wilkinson Knob (1138m). From here the final slog to Bridge Peak (1421m) begins (during this section I frequently found myself lying on the ground clutching tussocks to avoid being blown away!). To reach Kime, it is not necessary to climb to the top of the Bridge Peak. Look for poles heading SSW across a plateau and slight valley about 500m before the summit. Follow these poles south for 1km to reach Kime Hut.
Kime to Kaitoke - Day 4
Kime Hut to Alpha Hut
7 km (2.5-5 hours)
This section of the route follows the southern crossing, and is well documented elsewhere. From Kime, follow the signposted, marked route over the dress curcle: Field Peak (1483m), and Mt Hector (1529m - the high point of the walk - where a track heads east to Cone and Totora Flats Hut), the Beehives (1485m), Atkinson (1472m), Aston (1376m - where a track heads west to Elder Biv and Renata Hut), and Alpha (1361m). From Alpha, the main track swings east and descends 1km to Alpha Hut, 5 mins below the bushline.
Alpha Hut to Kaitoke
13km (2.5-7 hours)
Again, this section of the walk follows the southern crossing, so I deal with it only briefly here.
In the spirit of this walk (following the main ridge) I take my least favourite route from Alpha to Kaitoke: the Marchant Ridge. From the hut, the track drops east descending twice to 1000m for the twin saddles at Hells Gate, climbing back to pt1187 and Omega (1118m). The long boring slog along Marchant Ridge then begins: 11 km of trees, mud and treeroots. The only high-point is reaching the tree-less section (burnt down by careless trampers along with the former Dobson's Shelter), where views down the Hutt Valley can be seen. Side tracks lead to nice huts at Cone Hut, Tutuwai Hut (river crossings required) and to the depressing Smiths Creek Shelter.
Other alternatives from Alpha to Kaitoke are more entertaining, though they take slightly longer: Alpha to Kaitoke via Quoin Ridge, and Alpha to Kaitoke via the Eastern Hutt River. Maybe someone will write them up one day!